
CRUSH YOUR RECOVERY WITH THESE 3 RESTORATIVE STRETCHES FOR FOOTBALL PLAYERS
In this post, I’m revisiting my most popular blog post: Recovery Stretches for Football Players, with an updated overview and an emphasis on post-game, post-weight training sessions.
FYI — You can integrate breathing practices like Tubular Core that also addresses our nervous system’s response to physical and mental stress. This type of core activation and breath bracing when performed with these stretches will assist in the recovery and reset our body needs post game. Tap into your body and mind together and pay attention to how you react to these practices. Take note in your performance journal and discover how well you can enable yourself to dial up quicker when intensity calls again!
Athletes find this combination of breathwork and stretch especially powerful in letting go after a tough game, and moving positive energy and power towards the next opponent.
Preparing the body for intense competition tends to focus on strengthening it in the weight room, I won’t disagree, but more research has proven we can’t neglect our recovery methods and the power our neurological system has ahold of our physical game and how that transfers to sensory input and motor output. When it comes down to it, it’s our recovery methods prove advantageous when we need to be performing at our peak!
An athlete’s ‘fight and flight’ response (aka sympathetic nervous system) heightens during game time and depending on many other media impulses and activity a player sees on a given day could have a difficult time down regulating the nervous system. Some athletes also report how it also effects falling asleep.
Yoga and stretching transcends the purpose of leaning into the letting go.
PRO TIP: Always begin with a breath “check-in” to stimulate your vagus nerve and allow time to begin the down-regulation process. Repeat to yourself or out loud a positive self - talk statement like “release, relax and let go”. Observe the quality of your breath and focus on nasal breathing. Notice if you are creating movement below the low ribs during inhale/exhale. Practicing diaphragmatic breathing helps balance the nervous system.
Recent research also reveals that long bouts of chronic fight or flight activity has been associated with cardiovascular risks.
These 3 poses tap into the ‘rest and digest’ response (aka parasympathetic nervous system) to soothe the autonomic nervous system so that it is available for peak performance the next time we ask it to compete again.

1. CHILD’S POSE
Child’s Pose — Balasana — is a common beginners pose and is often used as a resting position in between more difficult poses in a yoga practice. The word Balasana comes from the Sanskrit word “Bala”, meaning “child”, and “Asana”, meaning “pose”. It means its perfect for in between games!
This pose stretches your hips, thighs, and ankles (tops of your feet for optimal plantar flexion and may be the toughest part to achieve in the pose- you could roll up a towel and place it under the tops of feet) while calming the mind. Emphasize breathing into your low back muscles.
It's a perfect way to de-stress and center yourself after a tough workout.
You can also try this pose with a block or bolster to support your head if yours does not meet the ground with ease.
How To Do Child’s Pose:
Begin on your hands and knees and spread your knees apart keeping your toes touching.
Exhale, and sit back onto your heels, while simultaneously lowering your torso to rest halfway between your thighs and suspended between your legs. As you do so, your arms can stretch forward, palms facing down or elbows bent for more restorative feel.
Allow your forehead to settle into the floor, and make small adjustments to find the most comfortable positioning for your body.
As you relax into this stretch, focus on your breathing in 360 degrees around your waistline, notice the sensations in your body and ease even further into this stretch while emphasizing the breath in your low back. Lengthen your body as much as it allows you.
Hold this pose for up to a minute or longer, as needed, and focus on your SELF (Slow, Even, Long Full) nasal breathing.
When you’re ready to release this pose, slide your hands back under your shoulders, press into the floor with your hands to lift your torso. Inhale as you become seated upright on your heels. Pause for a moment in hero pose and take in how you feel.

2. SUPINE PIGEON
Supine Pigeon, or Supta Kapotsana, is a Sanskrit word: Supta or “Supine”, Kapota or “Pigeon”, and Asana or “Pose”. Supine (lying down) helps to relieve stiffness in the outer hips and lower back and increases the range of motion of your lower body in the process.
How To Do Supine Pigeon Pose:
Lay on the floor on your back.
Bend your knees, soles flat on the mat. Separate your feet so that they are hip width apart and your thighs are parallel to one another.
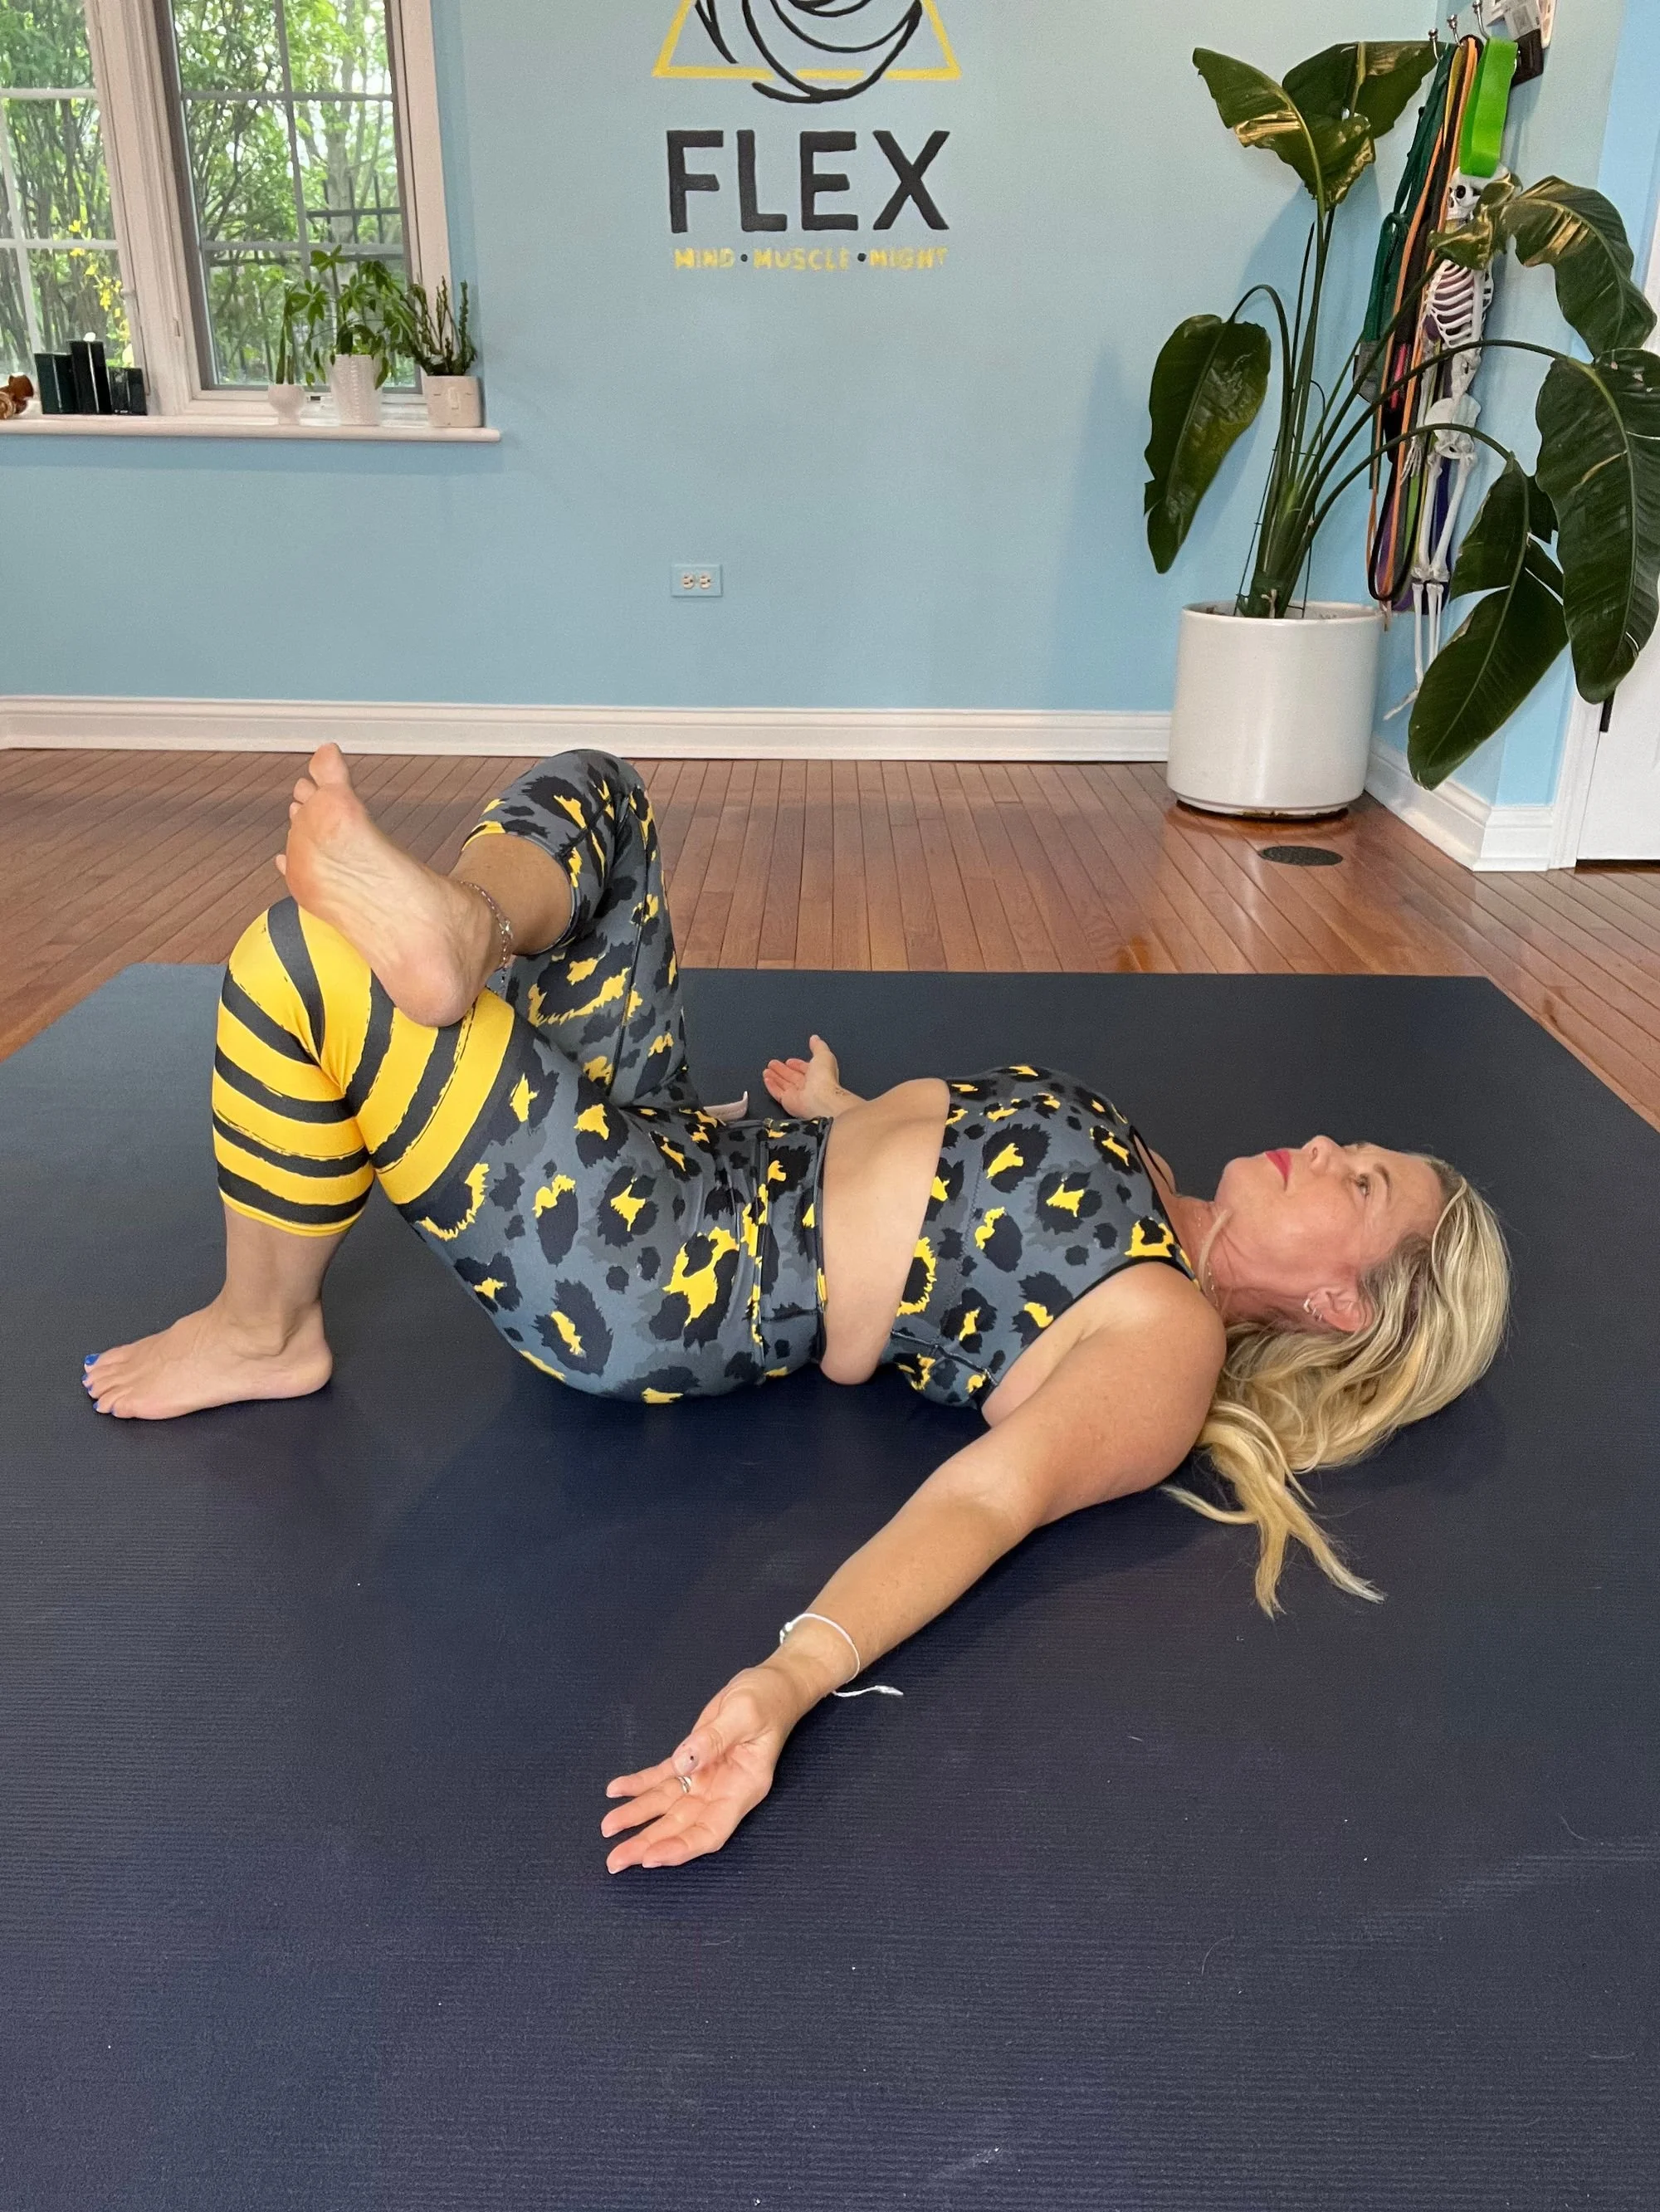
Straighten your left leg upward, extending your heel to the ceiling. Bring this straightened leg back down halfway, bending your knee in the process, and stopping to rest it on your right thigh. Your left foot should rest just off the side of your right thigh. Flex your left foot, pulling your toes toward your shin, move your left knee toward your opposite foot noticing the way your body feels as you do so.
When you’re ready, slowly bring your right leg towards you, and without releasing the position your foot is in. Raise your arms, clasp your hands around your back of thigh with interlaced finger grip as if you were giving your hamstring a hug. You may feel a deeper stretch now.
As you manually stretch your leg, pulling inwards, and gradually increasing resistance as you breath through the stretch, remember to keep your back, shoulders, and tailbone flat on the mat. Check in with your body to make sure that your shoulder blades are relaxed and positioned on the floor. Broaden your collarbones a bit so that you’re not curling in to reach your leg as much. Draw your tailbone and sacrum down toward the mat to further lengthen your spine as you stretch. Tuck in your chin slightly, tune into your breathing, and gaze down the center of your body. I encourage you to close your eyes if that feels natural when you focus on your breath to provide more down regulating feelings.
Hold this stretch for up to one minute, keeping focus on your smooth SELF breath, your relaxed face muscles, and ease you can create in your body while doing this stretch.
Release this stretch by straightening your left leg back towards the ceiling, and returning it to the floor, knee bent.
Repeat this process on your right leg, paying close attention to the sensations in your body as you breath and stretch.
Try this twist variation of Supine Pigeon Pose.

How To Get Into Supine Pigeon B (Twist Variation)
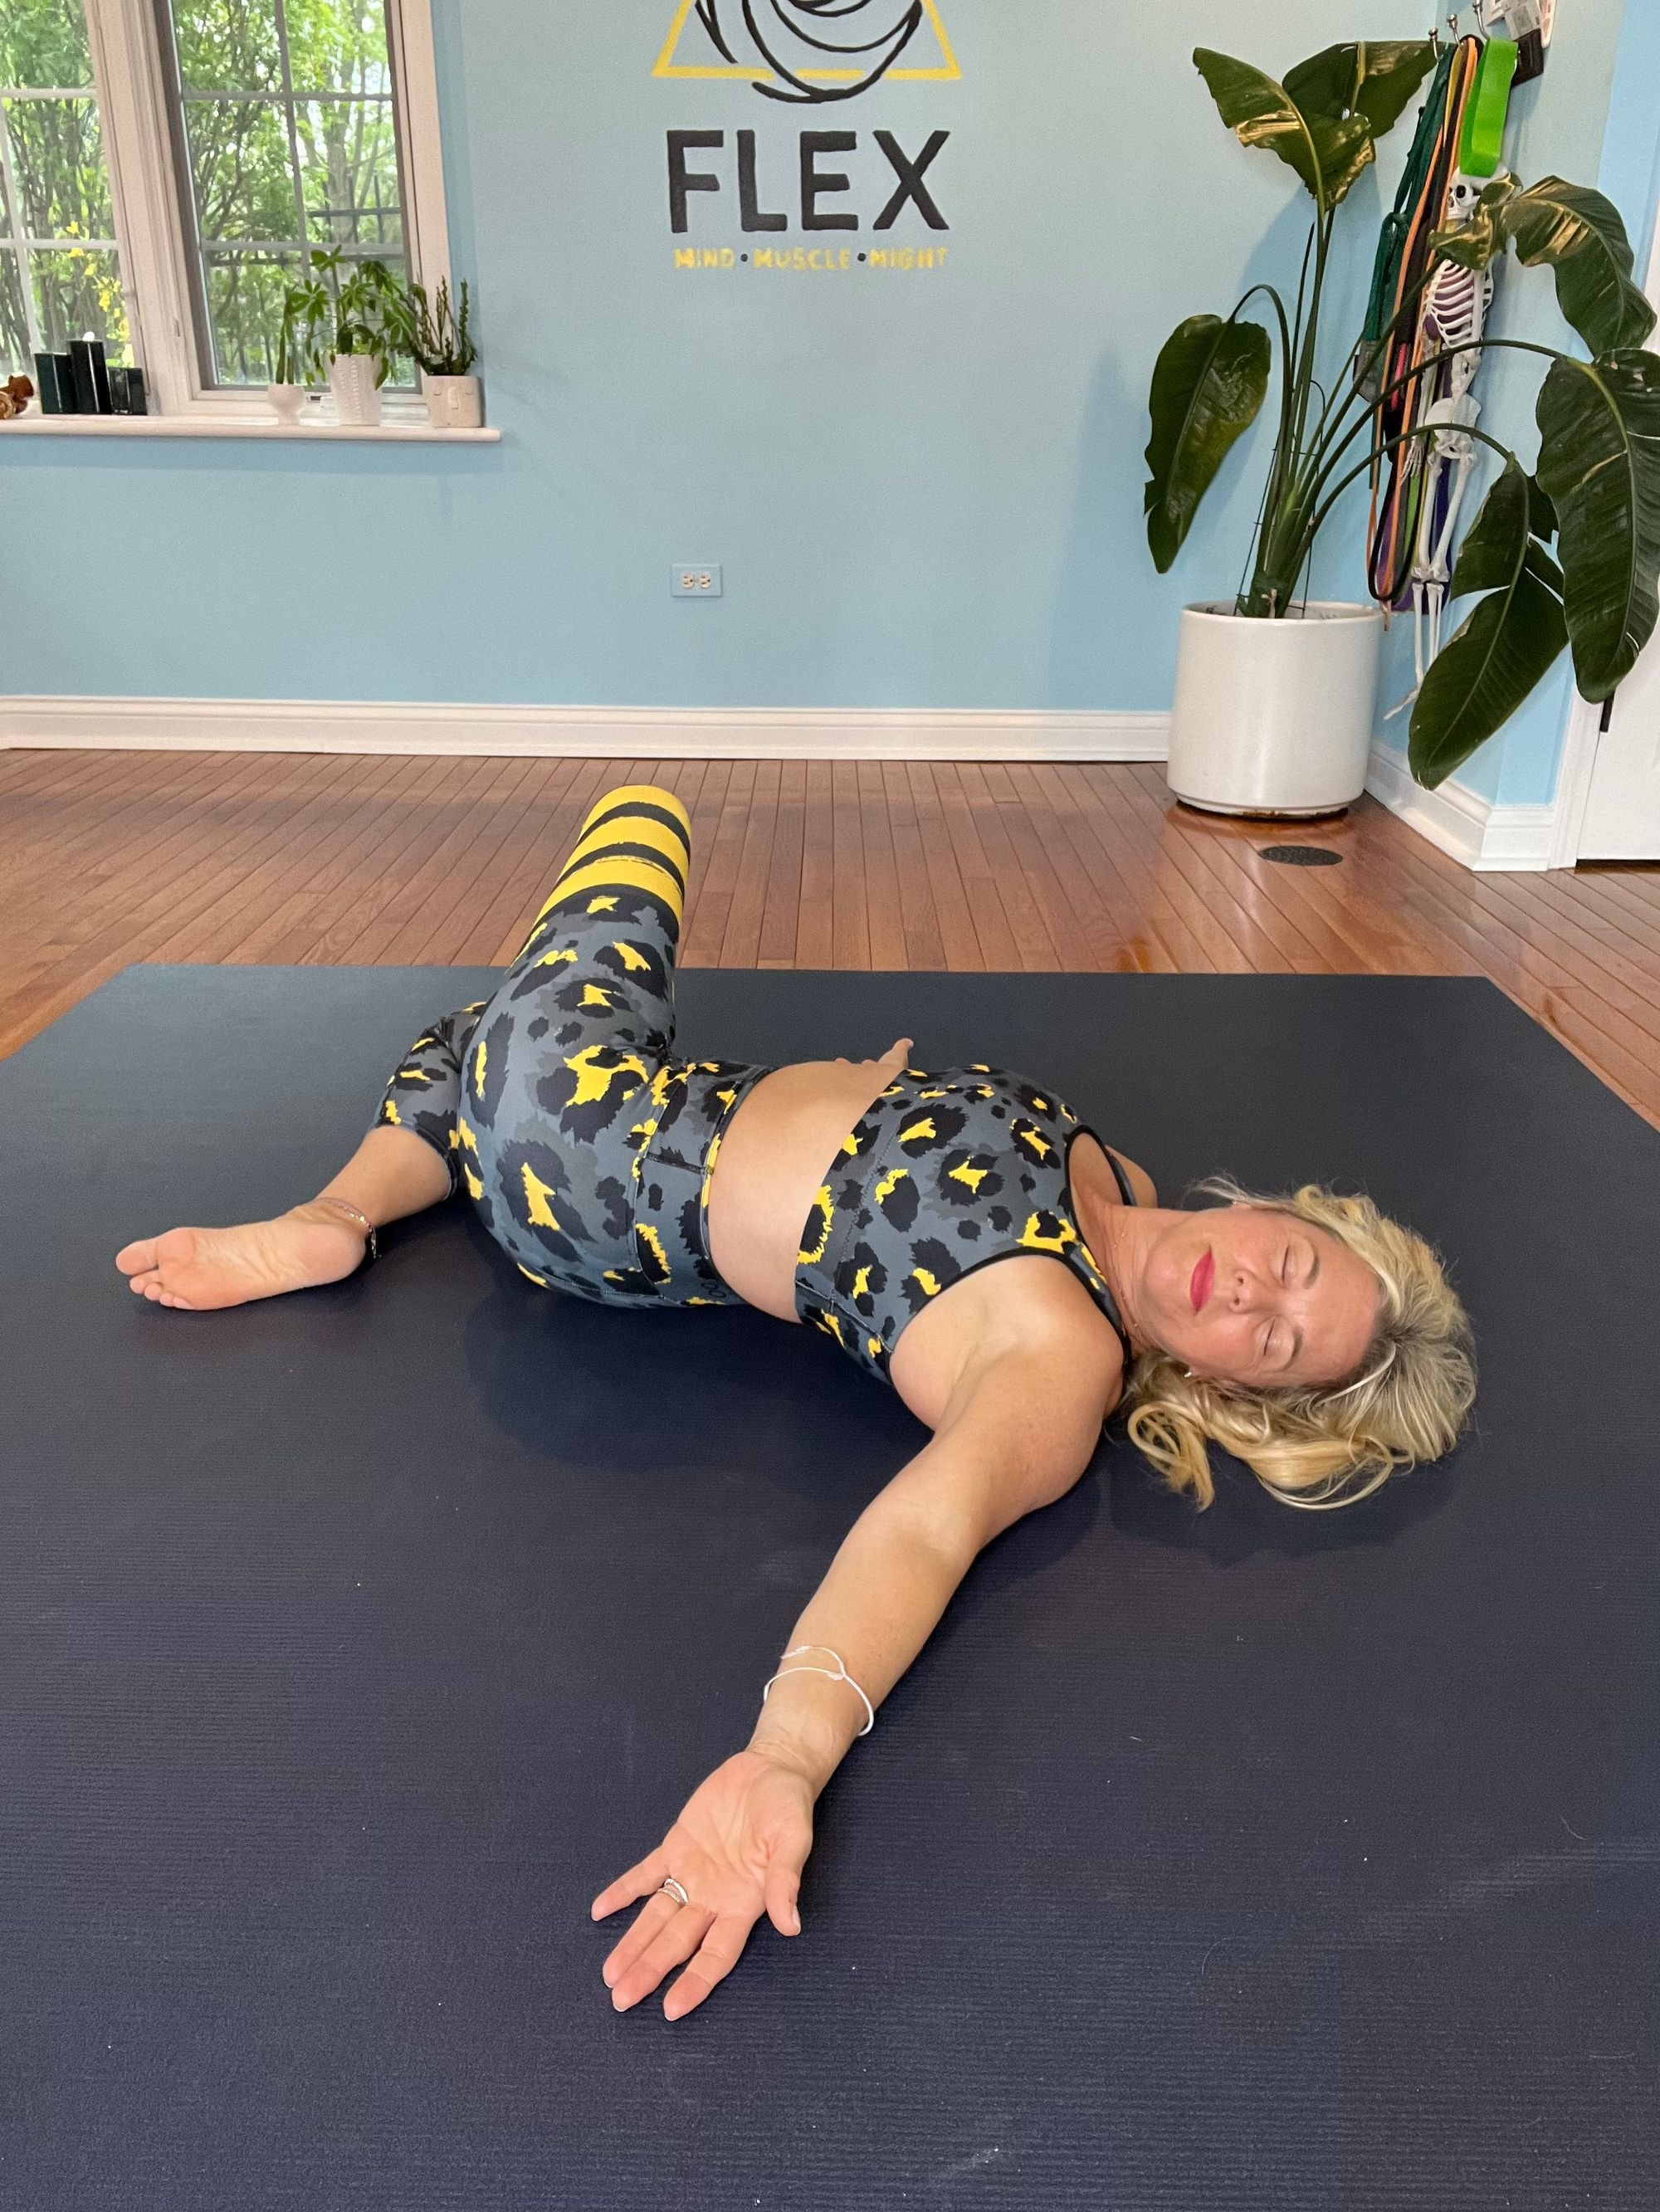
Follow the steps in the previous pose on one side, release your interlaced grip at the back of your hamstring and open your arms into a T position resting on the ground.
Keep the same set up of your left foot resting on your right thigh. Keep that figure 4 spacing the whole time.
Lower the sole of your left foot to the ground and gently keep the knee point up to the ceiling as best you can.
Breath into the stretch, turning your head the opposite way your legs are going.
Close your eyes and focus on relaxing your body deeper into this twist with each round of breathing.
To release this pose, slowly bring your head back to center, followed by your knees and hips. Extend your resting leg towards the ceiling, then release it by placing it gently on the floor again, knees bent.
Repeat this pose on the opposite side once more.

3. LEGS UP THE WALL
Legs Up The Wall Pose — or Viparita Karani, translates to “Inverted Action” in Yoga Sanskrit.
This pose is a rejuvenating inverted pose that brings relief to the body physically and mentally. It’s when you take time out of your day to do this pose, you’re reversing the forward motions of “doing, acting and accomplishing” and allowing your body much needed time to pause for a well-being check-in. It can also be done as the photo shown with legs up the headboard of your bed. Settling into this down regulating pose helps reverse blood flow against its regular gravitational pull (which is beneficial after long days of standing, running and/or jumping) and moves circulation from the legs to pump blood back to the heart more easily. Legs up the wall pose is a big time stretch for your hamstrings, calves, ankles, feet and spine. It will also prime the mind for a deeper meditation, relaxation, renewal, and self-awareness.
How To Get Into Legs Up The Wall Pose:
There are two ways to practice this pose: with or without props. Both provide the same benefits, but the supported version can help your nervous system drop into your parasympathetic side of your nervous system easier because your hips will be higher than your heart. The photo shows the unsupported version. (Supported add a bolster or pillow under the sacrum.)
Sit on the floor, with your right hip next to the wall in an L sit. Begin to lower your upper body to the bed or floor as you swing the legs up the wall or headboard.
Gradually work your butt closer to the wall, straightening the legs as you do so. This may not be possible if your hamstrings are feeling tight. Get your glutes and your legs as close to the wall as possible and with consistent practice you’ll find ease in this stretch over time.
Close your eyes, and relax deeper into your stretch. Hold this pose for anywhere between 5 and 20 minutes. If your feet fall asleep in this pose because the blood flow is reversed. Try sliding your soles of feet together and parting your knees in butterfly pose with edge of the 5th toe side of foot staying in contact with the wall. When the sensation dissipates either slide the legs back up the wall or come out of the pose all together by rolling to your side in a fetal position to push yourself away from the wall or headboard.
When you’re ready to release this pose, gently wake the body up by opening your eyes, noticing the room around you, and softly wiggling your fingers and toes. Roll to one side and rest for a moment, then carefully use your hands to press yourself back up into a seated position.
Remember, these are just a few poses that can help you recover productively after intense competition. There are many other yoga poses that can benefit football players and complement their training regimen. I encourage you to explore addressing your nervous system and its recovery further. And don’t hesitate to reach out to me with any questions!
Stay tuned here or find me at @yogijules7 everywhere else for more recovery and mobility training tips!
New here?
I’m Julie Mackey 👋 and I’m your mental skills and mobility coach here to help you unlock a next level of sport performance through 🎯 targeted mindset strategy, 💪 muscle FLEXibility and recovery, and 🫁 breath practices. Want to be 100% ready for what’s next?
Map out your peak performance strategy for this year! Book a free discovery call with me right now!